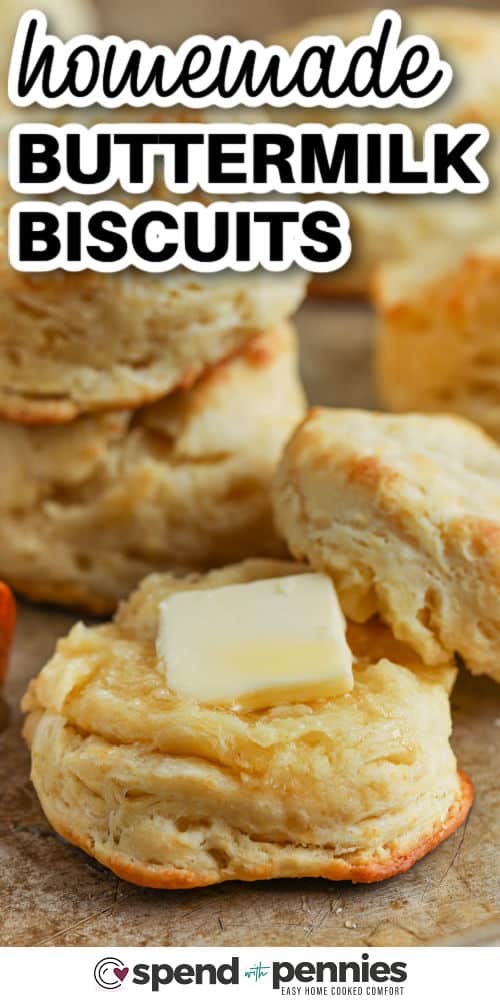
These Homemade Buttermilk Biscuits are fluffy, tender, and easy to make. Made with simple ingredients, they bake up golden and buttery.
Whether served for breakfast with strawberry rhubarb jam or with a bowl of tomato bisque for dinner, these homemade biscuits go with just about everything.

This post may contain affiliate links. Please read our disclosure policy.
Holly’s Recipe Highlights: Buttermilk Biscuits

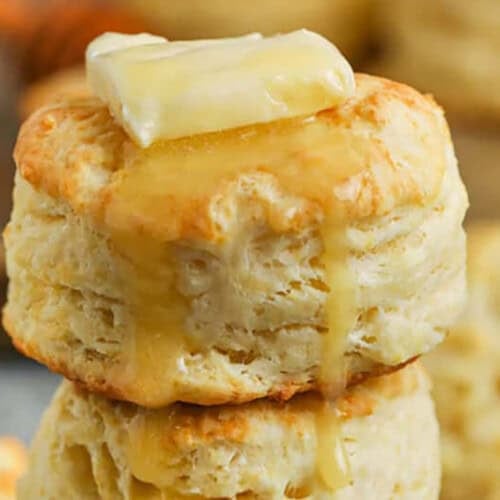
Flavor: Rich, buttery flavor with a subtle tang from the buttermilk and a light, fluffy texture.
The Technique: This fold-and-pat method creates flaky layers without any special equipment or a long chilling step.
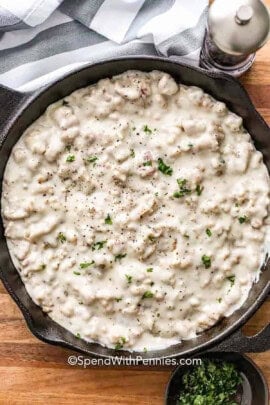
Serving Suggestions: Serve warm with butter and strawberry freezer jam, pair with this easy sausage gravy, or alongside a cozy bowl of split pea soup.
Total Time: 30 minutes Serves: 10 biscuits Cooking Method: Oven
Difficulty: Medium, with simple ingredients
Ingredient Notes

- Flour: All-purpose flour keeps these biscuits tender yet sturdy. Be sure to spoon and level the flour for the lightest texture.
- Butter: Cold butter is the key to flaky layers, so freeze it for a few minutes before cutting it in to help it stay in little pockets throughout the dough. Salted butter is fine to use.
- Buttermilk: Buttermilk adds a delicious tang and keeps these biscuits tender while helping them rise. Start with 1 cup and add just a little more if needed until the dough comes together nicely.
- To make a buttermilk substitute, add 1 tablespoon of vinegar or lemon juice to 1 cup of regular milk
- Variations: For a cheesy twist, add shredded cheddar right into the dough for a savory upgrade, mix in chopped chives or parsley for a fresh herb version, or brush the tops with buttermilk before baking for a little extra color.
How to Make Buttermilk Biscuits

- Combine the dry ingredients in a bowl.

- Cut in the butter until crumbly (full recipe below).

- Stir in buttermilk until moistened.

- Knead the dough gently, then cut with a biscuit cutter. Bake until golden brown.
Store, Freeze, Reheat
Keep leftovers in an airtight container at room temperature for up to 2 days or refrigerate for up to 4 days.
Freeze baked biscuits tightly wrapped for up to 3 months. Unbaked cut biscuits can also be frozen and baked from cold with a few extra minutes added.
Reheat in a 300°F oven for about 5 to 8 minutes or until warmed through.
Cozy Biscuit Pairings


Did you enjoy these Buttermilk Biscuits? Leave a comment and rating below.

Equipment
Ingredients
- 2 cups all-purpose flour
- 4 teaspoons baking powder
- 2 teaspoons granulated sugar
- ¼ teaspoon baking soda
- ½ teaspoon salt
- ⅓ cup cold butter
- 1 cup buttermilk
Instructions
- Preheat the oven to 450°F.
- In a large bowl, combine flour, baking powder, sugar, baking soda, & salt.
- Add the cold butter to the bowl and use two forks or a pastry cutter to cut the butter into the flour until the butter resembles large crumbs the size of a pea.
- Gradually add the buttermilk and stir with a spoon just until moistened. (You may need about 2 tablespoons more or less of buttermilk).
- Turn the dough onto a lightly floured work surface and gently knead a few times until the dough holds together.
- Pat the dough into a square and fold it over on itself 5 to 6 times.
- Pat the dough to 1-inch thick and cut using a sharp biscuit cutter, reshaping the scraps as needed.
- Place the biscuits on an ungreased baking sheet and bake 10 to 12 minutes or until golden.
Video
Notes
- Ensure butter is COLD. I place the butter in the freezer for a few minutes before starting.
- Cut in the butter until you have coarse crumbs about the size of peas.
- When cutting the biscuits, don’t twist the cutter. Just do one simple cut straight down. If twisted, this seals the edges and the biscuits won’t rise as well. The dough can also be pat into a rectangle and cut into squares.
- Use a sharp biscuit cutter. A round glass will produce the same size, the blunt edge will cause the same issue as above.
- Don’t overmix, the dough needs to just hold together and the butter needs to stay cold. Handling the dough too much will result in a tough biscuit. The heat from your hands will melt the butter.
- Use a lightly floured surface so you don’t add too much additional flour to the dough.
- Keep leftover biscuits in an airtight container at room temperature for up to 2 days, in the refrigerator for up to 4 days, and in the freezer for up to 3 months.
Nutrition Information
Nutrition information provided is an estimate and will vary based on cooking methods and brands of ingredients used.
© SpendWithPennies.com. Content and photographs are copyright protected. Sharing of this recipe is both encouraged and appreciated. Copying and/or pasting full recipes to any social media is strictly prohibited. Please view my photo use policy here.
Recipe slightly adapted from Food.com


Holly,
Thank you for a great recipe and directions! I FINALLY have the biscuit monkey off my back! They were flaky and fluffy and hubby loved them!
only made 5 biscuits at `1 inch
Sorry to hear that, Evelyn. This recipe should yield approx 10 biscuits, I’m not sure what could have happened!
Would putting the dry ingredients and the butter (cut in pats) in a food processor and carefully zapping it just enough until the butter is like peas be all right to do? Could that maybe process the flour too much?
Hi Vicki, I have never tried it with a food processor but we have always had great results using two forks or a pastry cutter to cut the butter. I would love to hear how it turns out for you!
I decided to give the food processor idea a try, and the biscuits turned out just great! I do have a pastry blender that I’ve used for years, and I have used a box grater with cold or frozen butter many times, but the processor was so much easier. I was very careful not to over-process the mixture…there were little clumps of butter in it…think I’ll probably use the Cuisinart food processor from now on!
Excellent Biscuit Recipe!
Delicious And Easy To Prepare!
Thank You!
These biscuits were delicious!
Can your Buttermilk Biscuits be made with gf flour and non dairy milk and butter?
We have not tried this recipe with gluten-free flour or non-dairy milk and butter so I can’t say for sure. Other readers have made these with GF flour with success but suggested using a bit more buttermilk. Let us know how they turn out!
10 minutes was too long in my oven at 450!
Sorry to hear that, Shelley! If you decide to try this recipe again, just keep an eye on them and pull them out of the oven when they’re golden.
These were amazing !!! THE BEST recipe I have ever found! I highly recommend. Also, I recommend watching the video so you can see the texture of the dough.
Southerners never use butter in biscuits because the water contents of butter can vary. Rather, we use shortening – or even better lard! When making buttermilk biscuits, the only leavening agent needed is baking soda, since the buttermilk provides all the acid needed. Baking powder contains both soda and cream or tartar (acid) and isn’t needed in buttermilk buscuits.
True!
But this recipe is so much more forgiving than your method. Even a Northerner like me could get this one right!
Sounds easy and excellent. I’m going to try now!
best biscuits ever
Absolutely LOVE THIS RECIPE! Simple and they taste so good! I put my butter in the freezer, then I grate it! Works really good that way….
That’s a great tip Cheryl! I am so glad you love this recipe!
I’ve tried so many biscuit recipes- some made with 7Up, or just cream, etc. and they were good but these are great! So tall and fluffy and tender! Made them spur of the moment while fixing breakfast and they were quick and easy to make. I have a convection oven so I lowered the temperature to 425 and they turned out perfect! Thank you for the great recipe!
Made the beef stew and the flakey biscuits! They were amazing! You made me a star in my house
I am so happy to hear the recipes were a big hit J!
I used cheddar and chives for the biscuits (just a handful of cheese and 1/4 c of chives. The recipe was easy to follow. The results were STUPENDOUS! I’m very happy with yet another one of your recipes!
That sounds delicious! I am so glad you enjoyed this recipe Lisa!
Can anyone tell me what size biscuit cutters they used to get this quantity equally to the recipe ? I have a set of cutter rings and unsure what size makes 10 biscuits
I used a 3-inch biscuit cutter. I hope this helps Bill!
I use frozen butter which I grate into the dry ingredients. Easy peasy
That’s a great tip Brenda!
Absolutely the best biscuits. I baked them in a cast iron pan . It made the bottom very yummy.
Great biscuits love them my all time favorite
This is an amazing biscuit recipe!
They just came out of the oven & of course we had to try one immediately. They came out Marvelous! I followed the recipe to the letter. Freezing the butter made all the difference.
The only thing was that they tilted. One side was higher than the other.
Does anyone know why that happened?
I didn’t place them very close together because the recipe didn’t say to one way or the other. So they were about 2″ apart. They may not look great; but they’re going to be smothered in sausage gravy.
This was my first time making homemade biscuits, other than using boxed Bisquik.
These Are Waaay Better!
I am so glad you enjoyed these Patti! When you cut out the biscuits, did you twist the cutter? That can cause the biscuits to be lopsided. You can also bake them with the sides touching and that should help!