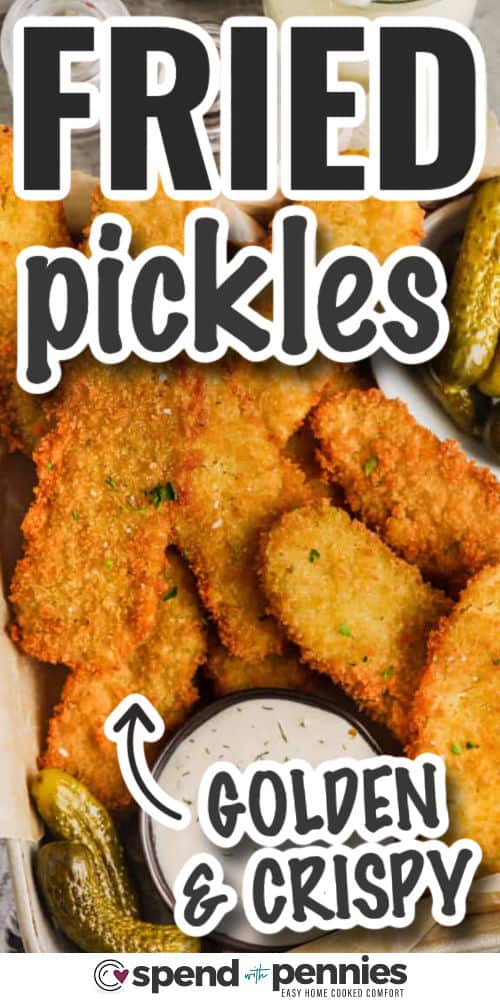
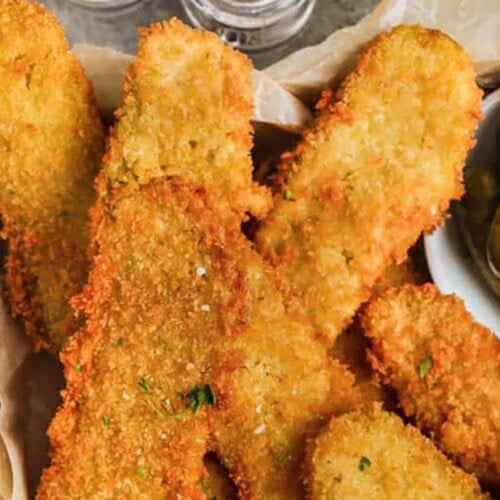
Fried pickles are a fun, crispy snack just like you’d find at the county fair. This easy version makes crispy fried pickles with a quick batter and crunchy panko. Serve them warm with ranch for dipping, or pile them onto burgers for extra crunch.

This post may contain affiliate links. Please read our disclosure policy.
Holly’s Recipe Highlights
- Flavor: Tangy dill pickles with a light, golden Panko crust for the ultimate crunch in every bite.
- Skill Level: Intermediate. This recipe requires shallow frying and attention to oil temperature for the best results.
- Prep Note: For the best crunch, dry the pickles first, fry them in batches, and keep them warm in the oven for easy serving.
- Serving Suggestions: Serve crispy deep-fried pickles right away with your favorite dips like buttermilk ranch dressing, blue cheese dressing, or homemade aioli.

Ingredient Notes
- Pickles: Use dill pickles for a classic flavor and crunch. Spicy, sour, or garlic pickles make fried pickles into a new recipe every time. For the best results, choose a thicker pickle and pat them dry before coating for a good crunch. Thin slices won’t hold up or give that bold pickle bite in every piece.
- Breading: A quick batter helps the crumbs stick to the pickles, especially after a short 5-minute rest. Panko gives the crispiest crunch, and dried dill adds a flavor boost.


How to Make Fried Pickles
- Combine batter ingredients (full recipe below) and let it rest for about 5 minutes.
- Pat pickle slices dry, dip each piece in the batter, then into the breadcrumbs.
- Fry in hot oil until both sides are golden brown.
Serve warm with your favorite dipping sauces.

Perfect Pickle Partners


Did you make these Fried Pickles? Leave a rating and comment below!

Equipment
Ingredients
- 12 dill pickle slices
- 1½ cups Panko bread crumbs
- ½ teaspoon cayenne pepper optional
- ½ teaspoon salt
- oil for frying
Batter
- 1 cup all-purpose flour
- 1 cup milk
- 1 teaspoon baking powder
- 1 egg
- 1 teaspoon paprika
- ½ teaspoon black pepper
- ½ teaspoon dried dill optional
Instructions
- In a non-stick skillet, preheat oil to 360°F to 370°F. In a medium mixing bowl, whisk Panko, cayenne pepper, and salt.
- In another medium mixing bowl, whisk flour, milk, baking powder, egg, paprika, black pepper, and dill until smooth. Let rest for at least 5 minutes.
- Meanwhile, dab the pickle slices dry with paper towels.
- Place about ½ cup of Panko bread crumb mixture in a small bowl.*
- Dip each pickle slice in the flour mixture and then gently dip into the bread crumbs. Set the dipped pickles on a baking sheet and let them rest for a few minutes while you dip the remaining pickles. This will allow the crumbs to stick better.
- Fry in small batches for 3 to 4 minutes or until brown and crispy. Transfer to a paper towel lined plate and immediately sprinkle with salt.
- Serve with ranch or your favorite dipping sauce.
Notes
- *Note: If the crumbs get wet, they don’t stick, so it’s best to use just a little Panko at a time, and keep adding to the bowl as you go (work in small batches).
- *Nutritional information is an estimate and will vary based on ingredients used and the temperature of the oil.
- Additional seasonings can be added to the batter. Try garlic powder or Cajun seasoning.
- Leftovers can last up to 3 days in the fridge. Reheat under the broiler or in the air fryer until crispy again.
Nutrition Information
Nutrition information provided is an estimate and will vary based on cooking methods and brands of ingredients used.
© SpendWithPennies.com. Content and photographs are copyright protected. Sharing of this recipe is both encouraged and appreciated. Copying and/or pasting full recipes to any social media is strictly prohibited. Please view my photo use policy here.
Recipe slightly adapted from Bake Like a Pro as seen on YouTube


Do you have a recipee for air frying the pickles?
We are currently testing air-fried pickles but haven’t perfected them yet. Hopefully over the next couple of weeks they will be published!
Great recipe! I popped the pickle spears on a parchment lined baking sheet in the freezer for about 8 hours after drying them, it really helps the batter stick and prevents the pickle from getting mushy when you fry it which I have found with other homemade fried pickles. For a little kick my husband likes to mix sriracha in the ranch for dipping.
Thanks for sharing your tips, Amanda! That sounds awesome.
Do your batter and stuff the same way just let them sit for 5 minutes before putting in air fryer. Cook for 5 mins flip cook 5 mins. Remove. Delicious we had these for the first time last night.
Will regular breadcrumbs work?
Yes, they’ll work just fine. Panko is a bit crispier but either will work.
One of the best ever crispy fried pickles recipe i have ever tried. Thanks for sharing this fried pickels recipe with all of us.
Seasoned or plain panko bread crumbs?
Just made these with my stepdaughter! They were incredible! Followed recipe exactly as written! The breadcrumb coating gave the pickles the perfect crunch!
Can u batter, coat with panko and put in fridge for a couple of hours before frying? Trying to prep ahead
Yes, these can be prepared ahead of time. You might like to put them on a rack on a pan to allow the air to circulate around them (so the bottom crumbs don’t get too wet from sitting).
Can I use buttermilk instead of regular milk? How much? 1 cup also?
That will work just fine. You would need the same amount (1 cup).
These are so delicious!!
I didn’t have baking powder still turned out delish!
I used spears and used gluten free flour in the batter. My only issue was that the batter didn’t seem quite thick enough. I thoroughly dried my spears but the batter was a little too much on the liquid side. Other than that they turned out great. I did use the suggestion of another and used old bay seasoning (in place of the other seasoning) and there was enough batter for two jars of spears (I did have to add a little extra breadcrumbs).
Seriously delicious! I followed the recipe exactly and they turned out fantastic! I will definitely be making these again soon.
I made some fried pickles. I thought I would save time by using some prepackaged Panko crumbs……Don’t ever do that! Mine were ruined. I never even thought to look at the sodium content. So when we went to bite into them the they looked great and the texture was perfect, but all we tasted was salt. It was terrible. This brand I chose ended up having almost 1000mg of sodium. Next time I’ll just take the time and do it right.
These are awesome. Also used batter for fried green tomatoes.
So glad you enjoyed the pickles Pam. I am going to have to try the batter with fried green tomatoes, that does sound good!
Worked beautifully. I made pickle spears, not slices but the batter coated really well and the taste was sooooo good. Used a bit of A&W seasoning salt after they came out of the fryer too. Super easy, gonna make these for a crowd sometime… probably going to need to make a LOT since they are delicious.
Definitely want to double this recipe for a crowd, I can’t stop eating them Lynnelle!
I’m from Maryland and we use Old Bay Seasoning in everything, give it a try in the dry ingredients.
That sounds like a delicious idea Carol!
May I ask how much you add to the dry ingredients?
Yes!!!
I so agree Simeon!
Thanks for the recipes! Always good and easy with things I have in my pantry!
You’re welcome Yvonne! Isn’t it the best when you have everything in your pantry already?!
Could you do these in an air fryer?
While I have only made this recipe as written I believe the fried pickles would be awesome in the air fryer Katen!
How do you make fried pickles
You’ll find the instructions on how to make fried pickles on the recipe card in this Crispy Fried Dill Pickles post. To find the recipe card, you can scroll down, or click on the Jump to Recipe button near the top of the page. Enjoy Casey!
Did you guys use fresh dill or dried dill in the batter?
You can use either but dried works perfect in this recipe!
Love these!!!! They turned out great!! They were a hit at the super bowl party!!! Exactly what I was looking for! Thank you!!
So glad you loved them Julie!