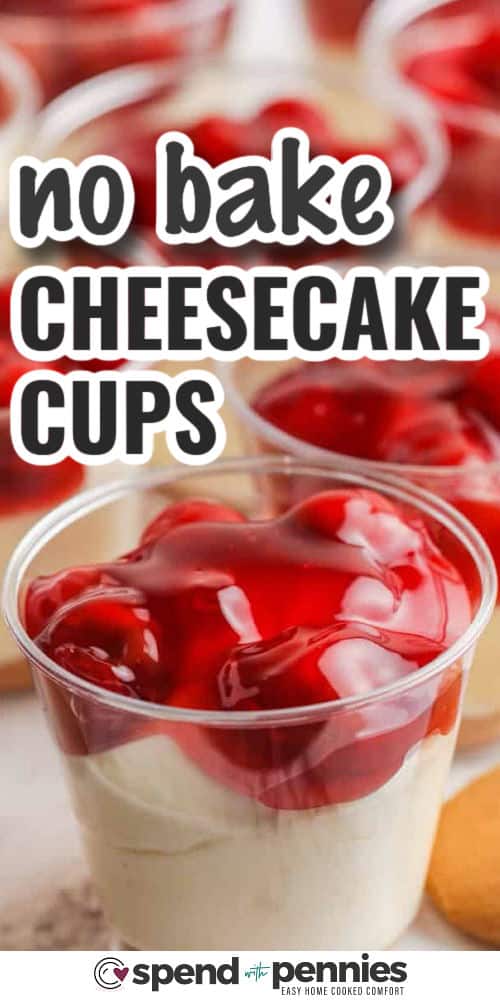
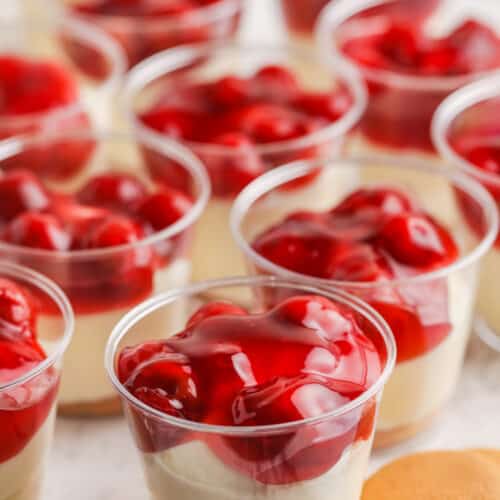
These easy no-bake cheesecake cups are the perfect individual dessert that comes together in minutes but tastes like a special treat. With a creamy, fluffy filling on a vanilla wafer base and your favorite fruit pie topping, they’re fun, festive, and totally irresistible.

This post may contain affiliate links. Please read our disclosure policy.
Holly’s Recipe Highlights
- Flavor: Light, creamy cheesecake with a soft vanilla wafer layer and a spoonful of fruity topping.
- Why Make It: These individual cheesecake cups are quick to assemble, easy to make ahead, and perfect for serving a crowd without any slicing required.
- Skill Level: Beginner-friendly with simple steps and no baking required.
- Make-Ahead Tip: Chill the cups before serving so the filling can set and the wafers soften into a tender, crust-like layer.
Ingredient Notes
- Cheesecake Filling: Use a full-fat block of cream cheese and let it soften completely for the smoothest texture. Whipped heavy cream makes the filling light and fluffy, while a little cornstarch helps it hold its shape.
- Vanilla Wafer Base: Whole vanilla wafers make these cheesecake cups quick to assemble and soften as they sit. Replace them with graham crackers, shortbread, or Oreos for a fun twist.
- Fruit Pie Filling: Cherry, strawberry, and blueberry pie fillings are always crowd-pleasers. Mix it up with fresh berries, lemon curd, caramel, chocolate sauce, or crushed cookies.
- Toppings: Add whipped cream, lemon zest, mini chocolate chips, crushed cookies, or toasted coconut for extra color and texture, or keep them simple with just the fruit topping.
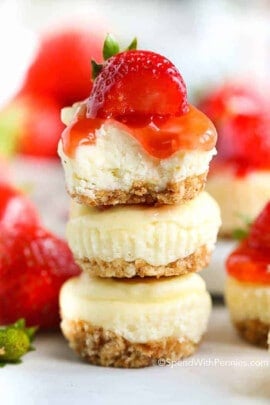
- Variations: Make mini cheesecake cups in smaller cups for dessert trays, add lemon zest to the filling for extra brightness, or skip the pie filling and top with fresh fruit just before serving.


How To Make Cheesecake Cups
- Beat the cream cheese until smooth.
- In a separate bowl, make whipped cream. Fold the whipped cream into the cream cheese (full recipe below).
- Place a vanilla wafer cookie in the bottom of each cup and pipe the cheesecake into each cup.
Refrigerate for at least 1 hour. Top with your favorite fruit toppings and enjoy!
Storing Leftovers
Keep leftovers in an airtight container in the refrigerator for up to 5 days. Freeze for up to 2 months. Thaw in the refrigerator overnight before serving.
Must-Try Individual Desserts


Did you enjoy this Easy Cheesecake Cups Recipe? Leave a comment and rating below.

Equipment
- 4 oz Plastic Cups or mini mason jars, 16 pcs
Ingredients
- 16 ounces cream cheese softened
- 1 cup powdered sugar
- 1 teaspoon vanilla extract
- 1 cup heavy whipping cream
- ½ teaspoon cornstarch
- 16 vanilla wafer cookies or more as needed
- 1 can prepared fruit pie filling cherry, strawberry, or blueberry
Instructions
- Beat cream cheese with an electric mixer until smooth. Add powdered sugar and vanilla and beat until combined. Set aside.
- In a medium bowl, beat heavy cream on low for 1 minute. Add cornstarch and turn the mixer onto high and beat an additional 3 to 4 minutes or until stiff peaks form. Fold whipped cream into the cream cheese mixture.
- Place one wafer on the bottom of each cup then fill with the cheesecake filling until 1" from the top of the cup.
- Spoon the desired pie filling on top. Chill at least 1 hour and serve.
Notes
- Store individual cheesecake cups in the fridge for up to 5 days. Freeze for up to 2 months, thaw in the fridge before serving. Leftovers (with toppings) can be frozen. These freeze beautifully.
- Nutrition information is based on 16 servings, this will vary depending on your cup/container size.
- The cheesecake will set up a bit thicker, and the cookie will soften as it chills. Overnight is best. If you don’t have much time to chill, crush the cookie before adding it to the cups. You can use any kind of cookie at the bottom of the cup.
Nutrition Information
Nutrition information provided is an estimate and will vary based on cooking methods and brands of ingredients used.
© SpendWithPennies.com. Content and photographs are copyright protected. Sharing of this recipe is both encouraged and appreciated. Copying and/or pasting full recipes to any social media is strictly prohibited. Please view my photo use policy here.


I am trying to avoid cornstarch. It’s there anything I can use instead?
If skipping the cornstarch I recommend using cool whip instead of whipped cream.
Easy and wonderful. Lemon curd addition an extra delicious touch 😋
I love the idea of adding lemon curd Monte!
We make this sort of thing and put them in the smallest mason jar with lid
Great for transporting
That’s a great tip Karen!
These Cheesecake Cups are SO delicious! I didn’t have the Cool Whip so I made mine with the cream cheese and powdered sugar. I used crushed graham crackers in the bottoms of my small glass jars (with lids) so I could keep leftover jars in the fridge, which I kept to have as a treat throughout the week. Just delicious and I plan to make these often. Thank you for the fantastic and delicious recipe! :)
Made these for my graduation because they are a great recipe for a lot of people! These were such a hit, especially with blueberry, I would make these 100 times over!!
Easy and delicious, I used the cool whip then the filling was clumpy so I added all the ingredients in the mixing bowl and blended until creamy, the poured into a graham cracker pie shell and chilled for 2 hours! Delicious
Absolutely delicious, I added some raspberry jam and it was perfect! Thank you
Can I make this with gelatin?
I have only tried this as written, you could check the package of gelatin to see if there is any information there.
How much cool whip instead of whipped cream?
You can replace the whipped cream with approximately 2 cups of Cool Whip. You don’t need cornstarch if using Cool Whip. Enjoy the recipe!
Hello
Thanks for this, just to confirm if I crush the wafers then they can be served and eaten immediately??
They need to chill for at least an hour to let the cheesecake filling set! But yes, we make this crust from premade vanilla wafers so they are safe to eat without baking.
I made these and added white chocolate to the cheesecake filling and topped with raspberry pie filling they where amazing
what a great idea and combination!! what did you do with the white chocolate? such as did you melt it first? Thank you!
I have never tried but melting it so it mixes in with the filling would probably work best.