
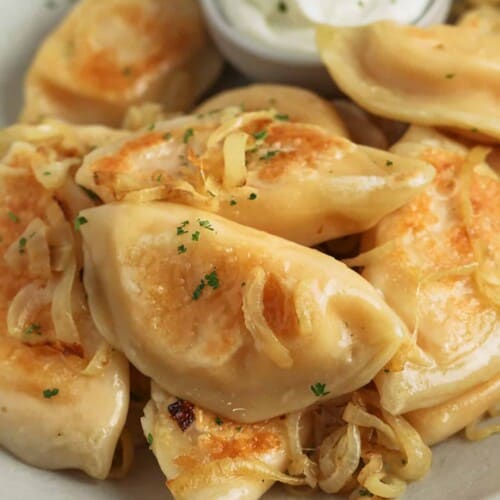
These homemade pierogi are a family favorite from my Grandma Mary’s kitchen. Tender dough is stuffed with buttery mashed potatoes and cheese, boiled, and then pan-fried until crisp. Serve them with buttery onions and a dollop of sour cream for a savory side or main dish!

This post may contain affiliate links. Please read our disclosure policy.
I Can’t Get Enough Of These Pierogi Because…
- This recipe comes from my Polish grandma and is one that I made next to her in the kitchen many times over the years.
- It’s made with ingredients you likely have on hand.
- The butter, potato, onion, and cheese filling make these rich and creamy.
- These little dumplings are an Old World comfort food that everyone will love.
I love this recipe so much I had to put it into my cookbook, Everyday Comfort.

What Are Pierogi?
Pronounced ‘puh-row-gee’, this dish can be spelled in different ways (pierogie, perogie, or perogy). Pierogi is plural but we do still call them pierogies.
Pierogi is one of Poland’s greatest dishes and an Eastern European favorite. They start with a simple flour-based dough and can be stuffed with a variety of sweet or savory fillings like blueberries, cottage cheese, or even sauerkraut.
We cook them by boiling them until they float and then pan-frying them until golden brown.
This recipe is for basic potato and cheese perogies (pierogi ruskie) that my grandma used to make for us. It’s my favorite version. We serve it with sour cream, caramelized onions, and butter.

Ingredient Notes
Dough: I do not recommend substitutions in the dough for the right consistency. While some recipes contain sour cream, this one does not, it’s the version my Polish grandma (my babcia) used to make. It is made with the perfect proportion of ingredients.
Filling: These traditional pierogi are filled with a smooth mixture of potatoes, cheddar cheese, and finely diced sautéed onions.
- Potatoes: The filling is mashed potatoes, so choose a starchy potato, such as russet potatoes or baking potatoes just as you would use for mashed potatoes.
- Cheese: Finely shredded cheddar is added to the potatoes; it’s best to shred the cheese yourself from a block.
- Seasonings: White onion is very finely diced and cooked in butter (be sure not to brown). My grandma always used white pepper to maintain the creamy color, but you can use fine black pepper as well.


How to Make Pierogi
Making this recipe takes time, so we set aside a day to make many batches. It’s fun to do as a family and one of the memories I grew up with.
- Make the Dough: Prepare the dough (recipe below) and gently knead.
- Make the Filling: Boil the potatoes and cook the onions in butter. Mash the potatoes. Add shredded cheddar cheese and the buttery onions. Cool the potato mixture.
- Roll the dough into circles 1/8-inch thick and 3-inches in diameter.
- Fill each circle with the mashed potato filling and press the edges to seal.
Cook or Freeze: Cook the pierogies according to the instructions below.


Tips for The Best Pierogi
FILLING:
- Ensure the potatoes are mashed until very smooth (a potato ricer can help make this easy).
- Shred your own cheese from a block. A sharp cheddar has more flavor.
- Do not brown the onions, just cook until tender.
- Taste the filling and adjust the seasonings as needed.


DOUGH:
- Don’t overwork the dough. Knead the dough gently until it’s smooth and pliable. If you overwork the dough, it will become tough and too elastic causing it to spring back when rolled out.
- If the dough is springing back, cover it with a towel and allow it to rest for 10 minutes before continuing.
- The dough should be rolled 1/8-inch thick and cut into 3-inch circles. If you do not have a 3-inch circle cutter, use a jar lid about 3-inches wide.
- Another way to prepare the dough is to pinch off a piece and roll it into a circle about 3-inches in diameter and 1/8-inch thick. I weigh all of my dough and divide it into 65 pieces. This is how my grandma always made them and how I usually make them too.
- Ensure the part that is pinched together is pinched quite thin so the dough isn’t too thick.

How to Cook Pierogi
Before cooking the pierogi, cook some finely diced or sliced onions in butter over medium-low heat. You want the onion to soften but not to brown.
Boil: While onions are cooking, bring a large pot of salted water to a boil. Add the pierogi and cook until they float. Once they float, they are done. Drain the water.
Panfry: Pierogi can be boiled and eaten, but we love to panfry them on medium heat in butter to golden brown.

How to Freeze Pierogi
Once assembled, pierogies can be frozen before cooking. They can be stored up to 4 months in the freezer.
Place pierogi on a parchment-covered baking sheet in a single layer and freeze. Once frozen, place them into a zippered bag with the date written on the outside. No need to thaw before boiling.
Did you love these Homemade Pierogi? Leave a comment and a rating below!

Ingredients
Dough
- 6 cups all-purpose flour
- 2 large eggs beaten
- 6 tablespoons canola oil or vegetable oil
- 2 teaspoons salt
- 2 cups cold water divided
Filling
- 3 ¾ pounds baking potatoes
- 1 medium white onion finely diced
- ⅓ cup salted butter softened, divided
- 4 ½ cups shredded cheddar cheese finely shredded
- salt to taste
- white pepper to taste, or very fine black pepper
For Serving
- 1 onion diced or thinly sliced
- 3 tablespoons salted butter or as needed for frying
- sour cream optional, for serving
Instructions
Dough
- In a large bowl add flour, eggs, oil, salt, and 1 ½ cups of water. Mix well to form a dough, adding more water if needed.
- Knead the dough on a flat surface for about 4 to 5 minutes or until it becomes smooth and pliable.
- Cover the dough with plastic wrap and let it rest at room temperature for at least 30 minutes or up to 1 hour.
Filling
- Peel the potatoes and cut them into 2-inch cubes. Place them in a large pot of salted water and bring to a boil. Cook the potatoes for 15 minutes or until fork tender.
- While the potatoes are cooking, in a medium skillet over medium-low heat, cook the onions in 2 tablespoons butter until tender without browning.
- Once the potatoes are cooked, place them in a large bowl and mash them. Add onions, cheese, and remaining butter. Continue mashing until the potatoes become very smooth. Taste filling and season with salt and pepper to taste.
Assembly *see note
- Using half of the dough, roll it out ⅛" thick. Cut out circles of dough using a 3" cookie or biscuit cutter.
- Scoop 1 ½ tablespoons of filling and roll into a ball, place on the pierogi dough. Fold the dough over to form a semi-circle and pinch the edges closed. Place on a baking sheet. Repeat.
- The pierogi can either be cooked or frozen at this point.
To Cook
- Heat 3 tablespoons butter in a large skillet. Add diced onions and cook on medium-low heat until tender. Remove onions from the pan and set aside for serving.
- Bring a large pot of salted water to a boil. Gently add pierogies and cook until they float, about 2 to 4 minutes. Remove with a slotted spoon.
- Transfer pierogies to the hot skillet (adding more butter if needed) and cook until browned on each side, about 5 minutes.
- Serve warm with onions and sour cream.
Notes
- Place pierogies on a parchment-covered baking sheet in a single layer and freeze.
- Once frozen, place them into a zippered bag with the date written on the outside.
- No need to thaw before boiling, cook right from frozen.
Nutrition Information
Nutrition information provided is an estimate and will vary based on cooking methods and brands of ingredients used.
© SpendWithPennies.com. Content and photographs are copyright protected. Sharing of this recipe is both encouraged and appreciated. Copying and/or pasting full recipes to any social media is strictly prohibited. Please view my photo use policy here.


The pierogies turned out so well! But, this recipe is super labor intensive. Good things take patience sometimes! I made enough to eat and enough to freeze from just half the dough. Had to take a break and will fill the rest tomorrow. Pro-tip, do not put them in a vacuum seal to freeze because they will squish and all of your hard work will blob together.
They’re definitely a labor of love. To vacuum seal, freeze them on a baking tray and once frozen you can seal them. Hopefully you were able to save the pierogi blob!
Great authentic perogie recipe.
I kept to recipe as guided, only adding diced bacon into my filling. (I also add some into the frying pan with the onions when finishing).
They were amazing-keeper recipe.
Nite: I didn’t get 65 and that is because I needed practice with the dough. I got better as I went! So you may need a practice batch first to get the handle on the dough rolling-shaping to get to the size/ratio that works. This isn’t a recipe issue- but a skill one! lol.
I’m Czech and my husband is a Professional Chef who is Polish. This recipe makes fabulous Pierogies. The dough is a bit softer and harder to work with than his, but the filling is amazing. Once you master the dough they are some of the best potato and cheese Pierogies we’ve made together. I believe the secret is the white onion in the potato and cheddar filling. Thank you for our new Christmas classic.
I’m so glad you both loved them Tami! Merry Christmas.
Hi. You mentioned that you weigh the dough. What weight should the dough be? Thank you.
It will vary slightly. Once you’ve prepared the dough, weigh all of it and the divide it by 65.
Thank you!!!
Just like how my Polish Mother made them!! Great recipe. Thank you. She also made with cabbage filling. Everyone asks me for her recipe!!! The most important thing was treat the dough tenderly – don’t over work it!
Could you make the dough ahead and freeze it?
I have not tried freezing the dough ahead of time. Let us know how it goes!
Sounds like a great recipe. I make Pierogi every year for Christmas Eve dinner. I will be using your recipe this year. Only difference will be the filling. We like ours filled with sauerkraut, so delicious. Thank you for the recipe.
My Grandma loved the sauerkraut filling the best too!
So delicious!
Looks easy enough and tasty
First time pierogi maker and WOW! Easy to make and they taste so much better than bought. I streamlined it by not boiling and cooked them in the skillet, adding water to the greased skillet and covering to steam cook, then crisping. Similar to cooking pot stickers and it worked like a charm. Will be making more in the future. A huge thank you to your grandma and you for sharing the recipe.
Can you use bread flour for this recipe? I went to the pantry but only have about a cup of all purpose flour left and don’t want to ruin an entire batch by using bread flour.
I haven’t tried this with bread flour so I can’t say for sure how it would work.
WOW!!! 60 yrs old I can’t believe I have never had a pierogi! Have some catching up to do! So good! Thank you for sharing! Waiting to roll out my second batch. This time adding cooked ground sausage. Maybe even top it off with country gravy?
Excellent Recipe. Delicious. Relatively Easy.
Filling is good, dough is lacking in description.
I’ve tried this recipe twice, both times the dough started off far too wet following the ratios described, tried adding flour to reach a workable consistency, but seem to have missed the mark both times, ending up with a very sticky, elastic dough (that last one is somewhat on me as the dough ended up overworked as I was trying to find the right flour content) as the recipe includes no description of how the dough should look and feel as you work with it and after it has rested.
The amount of flour is also only listed as volume, not weight making it harder to get this right.
The dough should be kneaded just until smooth and pliable, as you mentioned, overworking will cause it to become too elastic and it will be difficult to shape. As this particular recipe is also in my cookbook, I do have metric measurements (as my cookbook has metric for each recipe). I hope this helps!
6 cups (720g) all-purpose flour
2 large eggs, beaten
6 tablespoons vegetable oil
2 teaspoons kosher salt
1½ cups (360ml) cold water, more
as needed
Tried making the dough twice following instructions and it’s so thick and doesn’t roll out properly. Not sure how everyone else is doing it. Never had issues with any other dough before. Also 2 cups water but 1.5 in instructions. Where’s the other half ?
You add the additional ½ cup in step 1 if needed.
1. In a large bowl add flour, eggs, oil, salt, and 1 ½ cups of water. Mix well to form a dough, adding more water if needed.
First time pierogi maker here . These are hearty flavorful comfort food ! We loved them !
These had *excellent* flavor! They did take some time to make, as stated. I actually cut the recipe in half as my freezer space was limited at the time. I put the few we had left in the freezer and pulled them out last night and cooked them from frozen. They kind of stuck to the bottom of the pan and together, but I may(I did) have used too small a pan. This just served to remind me to make a new batch this week so we can have another great meal! A friend stopped by and took the leftovers with a gleam in her eye in anticipation. Thank you for an easy to follow, delicious recipe!
Okay if you like carbs stuffed with carbs wrapped in carbs. My husband and I were a little underwhelmed by these.
I think you just described my favorite meal Sorry these weren’t quite what you expected, thanks for trying our recipe!
Just commenting on your response to the “carbs stuffed with carbs wrapped in carbs” (so curmugeonly!). Your comment was classy and fun, plus I agree, so I’ll be trying this recipe ASAP! (went ahead and gave it 5 stars just not to lower the average)
These were pretty easy to make and were absolutely delicious!!!! I would give it five stars and we WILL be making these again!
Thank you so much, Dale! I’m so happy they were a hit!
These sound so good! Going to make them this week! Just a quick question though. You use oil for your dough, can I use lard? The oil I find has too much oleic acids that we don’t need. Thanks for the recipe.
I have never tried this recipe with lard but I would love to hear how it turns out for you!
We followed your recipe to the letter. Not only, was this a great tasty meal, filling and left us wanting more it was easy. I like easy. We had a few left overs, so wrapped and froze. Fast forward, decided to reorganize freezer, found sm bag, that tried to hide. It did somewhat crystal up, (my fault) but its been 3 months we went for it. WOW the taste intensified !! Our only problem, there was no more hidden gems to find in freezer. Husband made shopping list Guess, what we are making a double batch of. TY , for sharing and showing the how to’s. TO funny, ( i guess we are making the recipe x 3 ) Husband is rereading all comments which means, he is getting serious
I love that! I am so glad that you enjoyed them. They are definitely worth the effort to make!
They came out excellent. Tastes great. Dough is a little tacky, but a little more flour added to the dough fixed that. There’s lots of room to play with the filling to make it more to your taste. Enjoy them.