
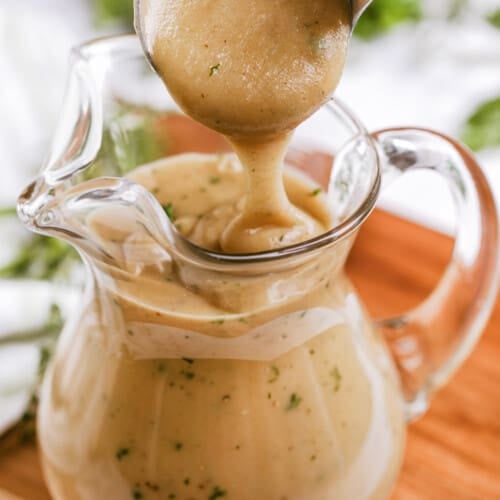
This classic gravy recipe is rich, smooth, and full of flavor from real pan drippings. With just flour, drippings or broth, and a few seasonings, you can make a savory gravy in minutes.

This post may contain affiliate links. Please read our disclosure policy.
Holly’s Recipe Highlights
- Flavor: Smooth, savory, and full of rich roasted flavor from the browned flour and pan drippings.
- Recommended Tools: A gravy fat separator is easy for removing fat from the juices.
- Prep Note: Letting the drippings rest separates the fat and juices for a balanced gravy.
- Freezing: Store cooled gravy in a freezer-safe container for up to 1 month; whisk while reheating to bring back the smooth texture.

Classic Gravy Ingredients
- Fat: The fat that melts off proteins as it cooks is often referred to as “drippings” or “fond.” Don’t forget to scrape those tasty bits from the pan; they’ll add maximum flavor to the gravy!
- Flour: This flour mixture thickens the gravy by creating a roux with the fat drippings. Cooking it until golden removes any raw taste.
- Broth: Broth from chicken, beef, or turkey, along with pan drippings, helps stretch the gravy and adds extra flavor. If your poultry seasoning already has salt, using a low or no-salt broth keeps it balanced.
- Seasonings: This homemade poultry seasoning is an all-purpose must-have for homemade gravy. I like to add a pinch of dried rosemary and about ½ teaspoon of onion powder for extra flavor.
Tasty Twists
- Add more flavor to homemade gravy using sauteed mushrooms or caramelized onions.
- Add a browning sauce such as Kitchen Bouquet for a darker brown color and extra flavor.
- No drippings? Gravy can be made with just butter or a combination of melted butter and oil. It will change the flavor to be more buttery.


How to Make Gravy
- Add the leftover fat drippings to a saucepan.
- Stir in the flour and seasonings (full recipe below).
- Gradually whisk in the broth until it reaches the desired consistency.
Season as desired before serving.


Storage Secrets
- Store leftover gravy in a covered container in the refrigerator for up to 4 days. Whisk while reheating on the stovetop and add a little broth to loosen if necessary.
- Freeze portions in zippered bags for up to one month. Thaw in a saucepan on low and season again, if desired.
Fixings and Sides for Holiday Meals


Did you make this easy gravy recipe? Leave a rating and comment below!

Equipment
- Gravy Separator optional
Ingredients
- ½ cup fat from drippings or unsalted butter*
- ½ cup all-purpose flour
- ½ teaspoon poultry seasoning
- 3 to 4 cups drippings add extra broth if needed
- 1 tablespoon chopped fresh parsley and/or fresh herbs to taste, optional
- salt and black pepper to taste
Instructions
- Once your meat is cooked, transfer it to a plate to rest. Use the liquid from the drippings to scrape any brown bits from the bottom and sides of the pan. Strain the drippings through a fine sieve if desired.
- Allow the drippings to rest for a few minutes (use a gravy separator, or a tall narrow container) so the fat and drippings separate. The fat will rise to the top. Spoon ½ cup of the fat into a medium saucepan, adding butter to make ½ cup if you don't have enough fat.
- Stir in the flour and poultry seasoning and cook for 3 to 4 minutes over medium heat, while stirring, until the flour begins to brown slightly and the mixture has a slightly nutty smell.
- Gradually add the drippings and/or broth, whisking until smooth after each addition. The mixture will be very thick at first and will gradually thin out; you may not need all of the broth.
- Bring to a boil over medium heat while whisking, and let boil for 1 to 2 minutes.
- Taste the gravy, and season with salt & pepper as needed. Stir in parsley or other fresh herbs and serve.
Video
Notes
- When spooning ½ cup of the fat into a saucepan, skim the remaining fat and set aside in case you want more.
- If you do not have enough fat, add unsalted butter to make a total of ½ cup fat.
- If you do not have enough juices/drippings from the meat, add additional broth (canned, boxed, or homemade). I prefer to use full sodium for the best flavor. Broth can also be used to thin the gravy out if it is too thick.
- Optional herbs: ½ teaspoon onion powder or ¼ teaspoon garlic powder can be added to the flour when cooking in the fat. I love to add ½ teaspoon poultry seasoning to my gravy, regardless of which type of gravy it is.
- Leftovers will keep in an airtight container for 4 days in the refrigerator and 4 weeks in the freezer.
Nutrition Information
Calories: 618 | Carbohydrates: 4g | Protein: 1g | Fat: 67g | Saturated Fat: 28g | Polyunsaturated Fat: 7g | Monounsaturated Fat: 29g | Trans Fat: 0.3g | Cholesterol: 77mg | Sodium: 90mg | Potassium: 10mg | Fiber: 0.2g | Sugar: 0.03g | Vitamin A: 267IU | Vitamin C: 0.5mg | Calcium: 4mg | Iron: 0.3mg
Nutrition information provided is an estimate and will vary based on cooking methods and brands of ingredients used.
© SpendWithPennies.com. Content and photographs are copyright protected. Sharing of this recipe is both encouraged and appreciated. Copying and/or pasting full recipes to any social media is strictly prohibited. Please view my photo use policy here.


From the recipe notes: When spooning ½ cup of the fat into a saucepan, skim the remaining fat and set aside in case you want more.
If you do not have enough fat, add unsalted butter to make a total of ½ cup fat.
If you do not have enough juices/drippings from the meat, add additional broth (canned, boxed, or homemade). I prefer to use full sodium for the best flavor. Broth can also be used to thin the gravy out if it is too thick. Can I use Schmaltz and better-than-bouillon?
Yes, both of those will work just fine!
O my goodness- just made this gravy/technique from drippings of a Missippi pot roast- delicious! You are the bomb! Thank you!!
I usually don’t have enough drippings since there is just two of use, thanks for the tips.
Glad we could help!
Excellent gravy thank you
So glad you enjoyed it, Henriette!
Yummy
love crock pot recipes
Hi David, you can see all of our Crock Pot recipes here!
Question: how do I make a turkey or chicken gravy brown. While I have no issues with a light coloured gravy, I have family members that don’t think gravy is *really* gravy unless it’s dark brown, like a beef gravy. To make things even trickier, I can’t use commercial gravy browning due to high sodium levels.
Hi Penny, you could try cooking the roux longer so it is darker in color, but it will change the flavor of the gravy. You could also try adding Kitchen Bouquet which is low in sodium. I hope this helps!
When I don’t have enough drippings I use Better than Bouillon paste Poultry flavoring. I does wonders.
Thank you for sharing that great tip Shirley!
Great step-by-step recipe. Thank you!
Thank you, Josephine! I am glad you enjoyed it.