
Caramel apples are an impressive treat that are so easy to make at home.
Why buy caramel apples for the next Halloween party when all you need for these fun treats is 3 simple ingredients – apples, caramel bits, and milk!

This post may contain affiliate links. Please read our disclosure policy.
Homemade Caramel Apples Recipe
This is a classic caramel apple recipe, and a super fun and delicious way to eat apples. Get the kids involved for a fun activity!
- Only 3 ingredients.
- The steps are so simple.
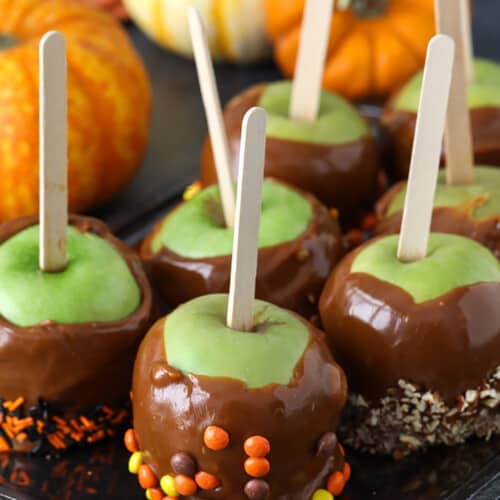
- Decorate each caramel apple with different candy, nuts, or sprinkles.
- No need for a candy thermometer or other fancy equipment.

Ingredients for Caramel Apples
Apples – The best apples for this recipe are tart apples like Granny Smith or Honeycrisp. Make sure that they are bruise and blemish-free. Use lemon juice or vinegar to scrub off the waxed coating, making it easier for the caramel to stick.
Caramel Coating – Store-bought caramel bits and milk are all you need for these caramel apples and it can be made on the stovetop or in the microwave.
Milk can also be replaced with some cream for a thicker and richer caramel coating. Try making homemade caramel sauce with sugar, corn syrup, heavy cream, butter, and vanilla.


How to Make Caramel Apples
- Scrub the apples per the recipe below to remove any waxy coating.
- Melt the caramel bits and milk and dip each apple into the caramel sauce until coated.
- Roll in the chosen toppings and refrigerate for a couple of hours.

Storing Apples
- Keep these apples from sources of heat, as the caramel will melt.
- It is also important to keep them wrapped in cellophane, or parchment paper or in an airtight container. They are sticky! Covering them will keep dust and other things from sticking to the coating.
- When storing in a container place a piece of waxed paper between the apples, this will prevent them from sticking together.
- They will keep in the refrigerator for up to 2 weeks.
More Caramel Treats to Enjoy


Did you make these easy Caramel Apples? Be sure to leave a rating and a comment below!

Equipment
- 1 Saucepan
- 4 Lollipop Sticks or popscicle sticks
Ingredients
- 4 granny smith apples
- 14 ounces caramel bits or unwrapped caramel squares
- 2-3 tablespoons milk
Instructions
- Clean the waxy coating off of apples by scrubbing them in a large bowl full of water with 2 tablespoons of vinegar or lemon juice added.
- Remove the stems and push or tap a popsicle stick into the stem end. Use a rolling pin or mallet to tap them in if they resist. Chill apples well in the refrigerator.
- Prep a baking sheet by lining it with lightly buttered parchment. Move apples to the freezer, just for the 5 minutes it takes to melt the caramel.
- Heat caramel bits and milk in a saucepan on medium-low setting until smooth and creamy, stirring consistently. Do not boil.
- Dip each apple into the hot caramel while turning to coat. Roll the coated apples in toppings if desired.
- Place apples on the prepared pan and cool completely in the refrigerator, about 2 hours.
Notes
- For Microwaving: Place caramel bits and milk in a medium bowl and microwave for approximately 4 mins, in 30 second intervals, until smooth. Stir between intervals and let caramel sit 2-3 minutes before coating apples. (We found the caramel comes out smoother and is easier to control when cooked on the stovetop.)
- Be careful not to bring the caramel to a simmer or boil, as doing so will set the candy and make your caramel too hard.
Nutrition Information
Nutrition information provided is an estimate and will vary based on cooking methods and brands of ingredients used.
© SpendWithPennies.com. Content and photographs are copyright protected. Sharing of this recipe is both encouraged and appreciated. Copying and/or pasting full recipes to any social media is strictly prohibited. Please view my photo use policy here.


